68bf76534a2ac
AlumniFinder Online Administrator’s User Guide
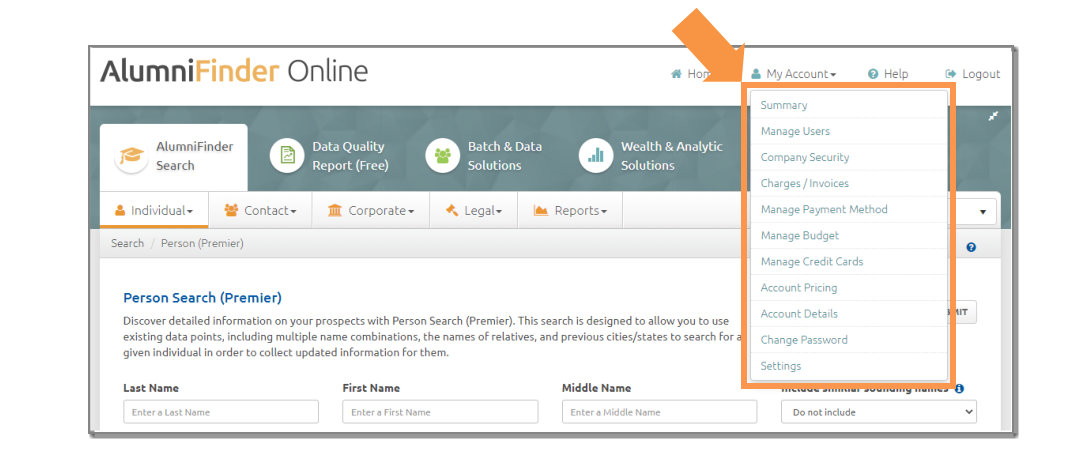
The AlumniFinder Online portal, designed specifically for development and fundraising professionals, includes a designated Administrator feature. An organization’s Administrator will have full access to all of the functions within the “My Accounts” menu.
For the purposes of this guide, we will highlight those made available exclusively to Administrators:
- Manage Users
- Company Security
- Charges/Invoices
- Manage Payment Method
- Manage Budget
My Account
The Manage Users section allows Administrators to add new users to AlumniFinder Search and enable/restrict their access to the platform. You can apply the “All” filter to quickly see which members of your team are Active, Inactive, Suspended, or Disabled, as well as the day and time of their last login.
Administrators may also enable permissions for other users to function as an Administrator if needed; however, we recommend limiting this due to the level of access the user would have.
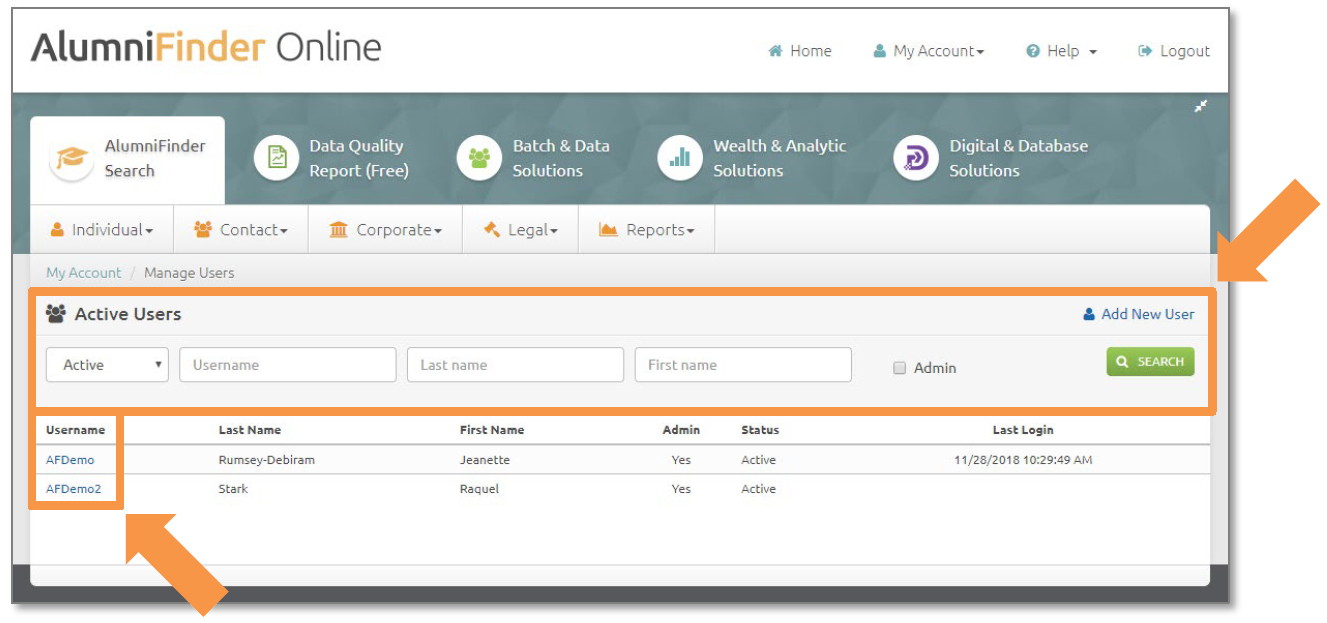
Reactivate a User
To reactivate a user that is inactive, suspended, or disabled:
- Click on the “Username” hyperlink; the “Edit User” page will display
- In the “Account Settings” area found in the lower right-hand corner of the page, click the “Reset Login” link, check the “Approved” box, and uncheck the “Suspended” box
- Click the “Save” button to complete your changes
- The user will be reactivated and their current password will remain
Add a New User
To add a new user to your account:
- Click the “Add New User” icon above the green “Search” button; the “Add User” page will display
- The following fields will be prepopulated based on contact details of the main account:
- Company Name
- Address Line 1 and 2
- City, State, and Zip Code
- Phone
- The following fields will need to be completed:
- User Name
- First Name
- Last Name
- Job Title
- Email address
- Password*
*Please note that the user will be prompted to create a new password and security question when they login for the first time. - Account Settings
- Company Admin: Enables a user to have access to restricted Administrator functions (this should be limited to only those users requiring this level of access)
- Approved: Enables a user to have general access to AlumniFinder Online
- Suspended: Disables a user from having any access to AlumniFinder Online
- Click the “Save” button to complete your changes
- The user will be reactivated and their current password will remain
For any users that need to be permanently restricted from accessing the system, please contact your AlumniFinder Account Representative for assistance. As a reminder, when a user is no longer permitted to have access to the site, you are required to permanently disable their access.
The Company Security section allows Administrators to view the Login History for all users of the organization, manage the idle timeout limit, and choose the types of searches and reports that are accessible within AlumniFinder Search. Changes can be applied globally or restricted to particular users.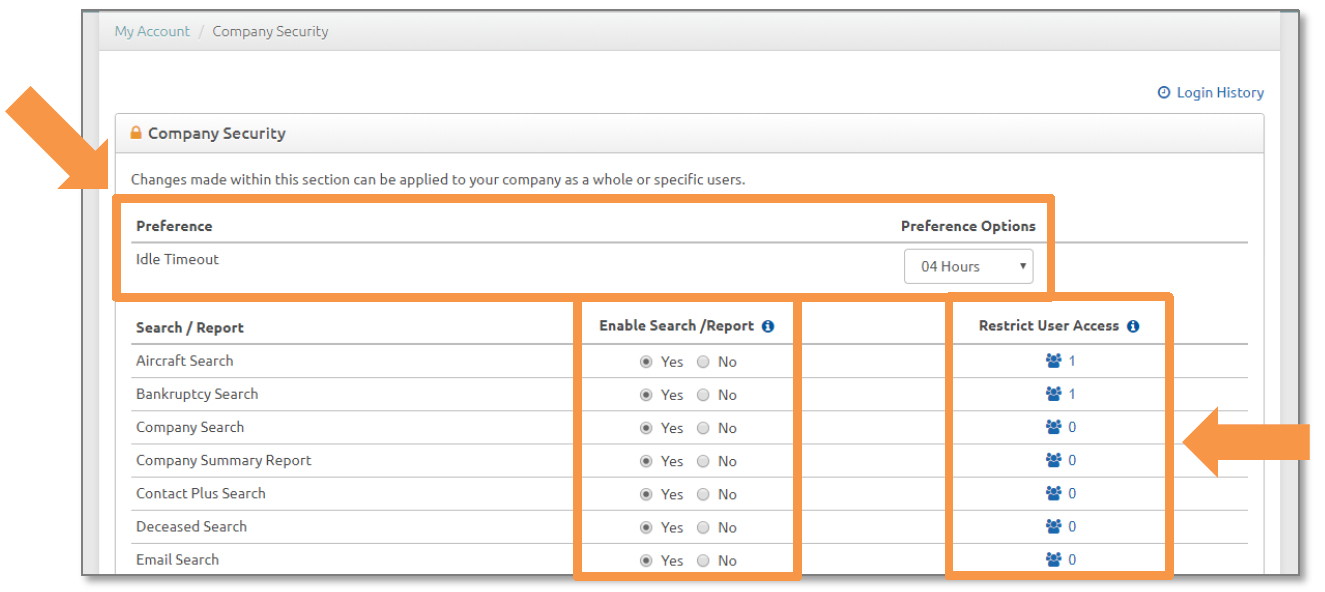
Idle Timeout
The Idle Timeout setting allows Administrators to determine how long users can be active within AlumniFinder Online before the system logs them out. To change the Idle Timeout setting:
- Choose the desired timeframe (from 10 minutes to 8 hours)
- Click the “Save Changes” button at the bottom of the page
- The change will be applied globally for all users
Enable Search/Report
The Enable Search/Report feature allows you to customize which searches and reports the members of your organization will have access to.
- Simply select the “Yes” or “No” radial for the Search/Report selection
- Click the “Save Changes” button at the bottom of the page
- The change will be applied globally for all users
To make changes to one or more options in the Search/Report column that affect a particular user:
- Click the blue person icon in the “Restrict User Access” column
- Check the box next to each username that should be restricted
- Click the “Save Changes” button at the bottom of the page
- The changes made on this page are applied only to the specific users you selected
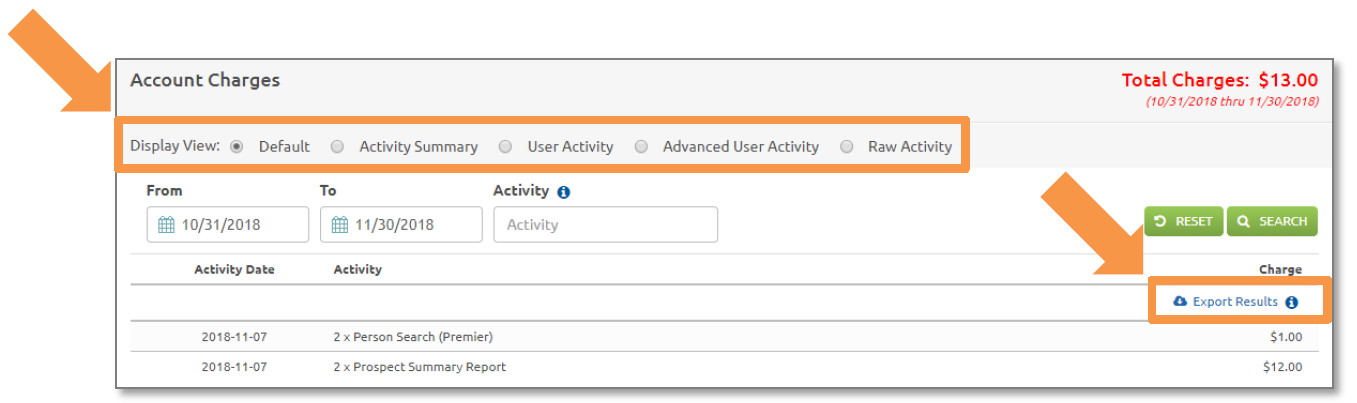
The Charges/Invoices section Administrators to view the current month’s total, usage, by user, and invoices for last three billing cycles.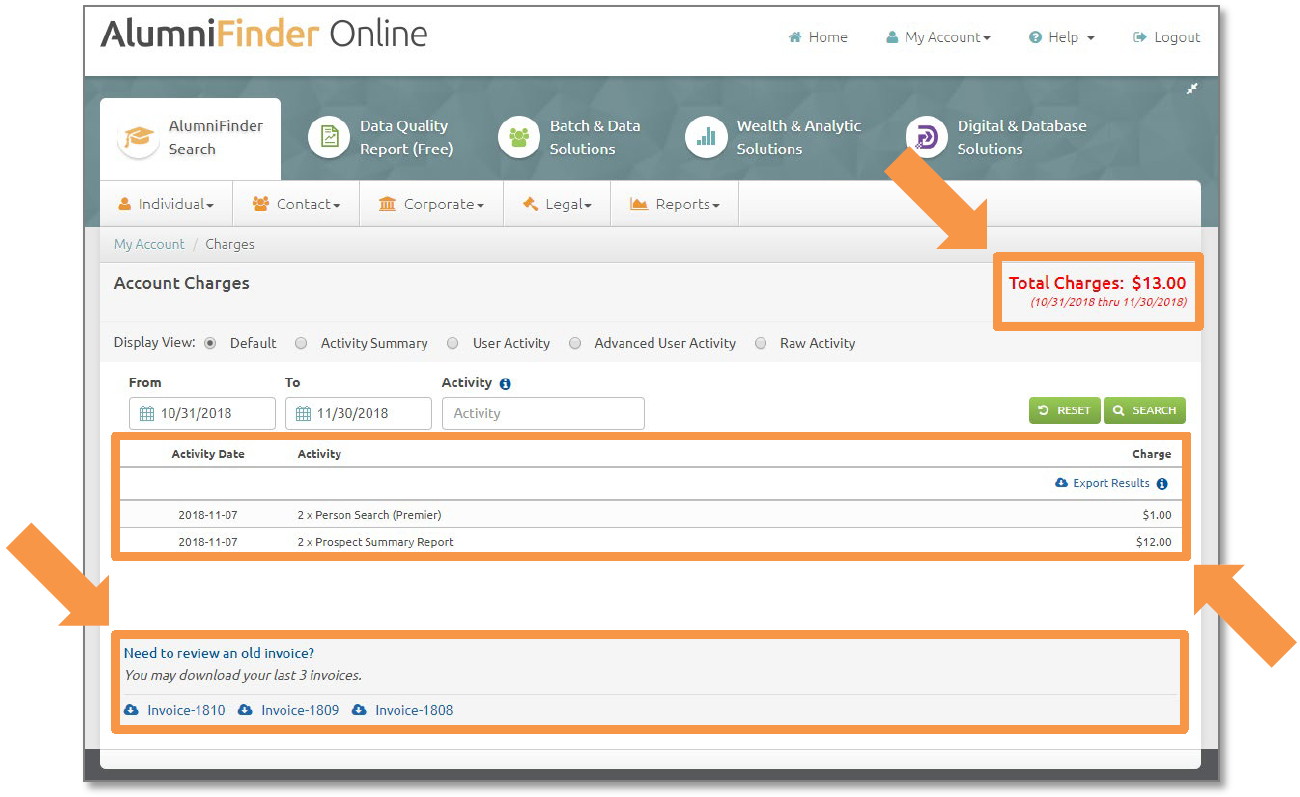
Total Charges for the Month
The total charges for the current month are displayed (in red) on the right-hand side of the screen. From this screen, you can also identify specific user activities by date using the “From,” “To,” and “Activity” filters.
The Default View includes of times each search and/or report was run along with the associated cost. For added detail, there are four additional views you can choose to each individual charges, the amount of activity, and activity by user. Please note that each report can be exported to Excel by clicking the blue cloud icon on the right-hand side of the page.
- Activity Summary: View the types of activity (searches and reports) by the number of times that activity was performed, along with the associated charges
- User Activity: View the types of activity (searches and reports) by the number of times that activity was performed, along with the associated charges, by user
- Advanced User Activity: View each search/report performed by user name, first name, last name, activity (“Request” column), search criteria, reference code, date/time, and the cost
- Raw Activity: View Each search/report performed by the activity date, type of activity, cost, user, if the search/report returned results, if the activity was associated with a promotional “free click,” any discounts that applied, and the associated charges
Past Invoices
The last three months invoices are also available and can be found on the bottom left-hand corner of the page. To view/download a copy, click on the link for that invoice. Please note that the naming convention represents the year and month of the invoice.
The Manage Payment Method section allows Administrators to select their payment preferences for AlumniFinder Online. To receive an invoice, select “Invoice My Company” to utilize a credit card, select “Charge My Credit Card.” To pay with a credit card, you will need to submit your credit card information by clicking the blue “Add Credit Card” link. You will be redirected to a form to complete. Please carefully complete all of the required fields. To save a particular credit card as your default payment, click the “Save as Default” option and then click the “Save” button at the bottom of the screen.
If you select the invoice option, you will receive an invoice (at the end of the month) from AlumniFinder’s parent company, AccuData Integrated Marketing. The “Invoice Reference” option will allow you to include a job or PO number that appears on all invoices.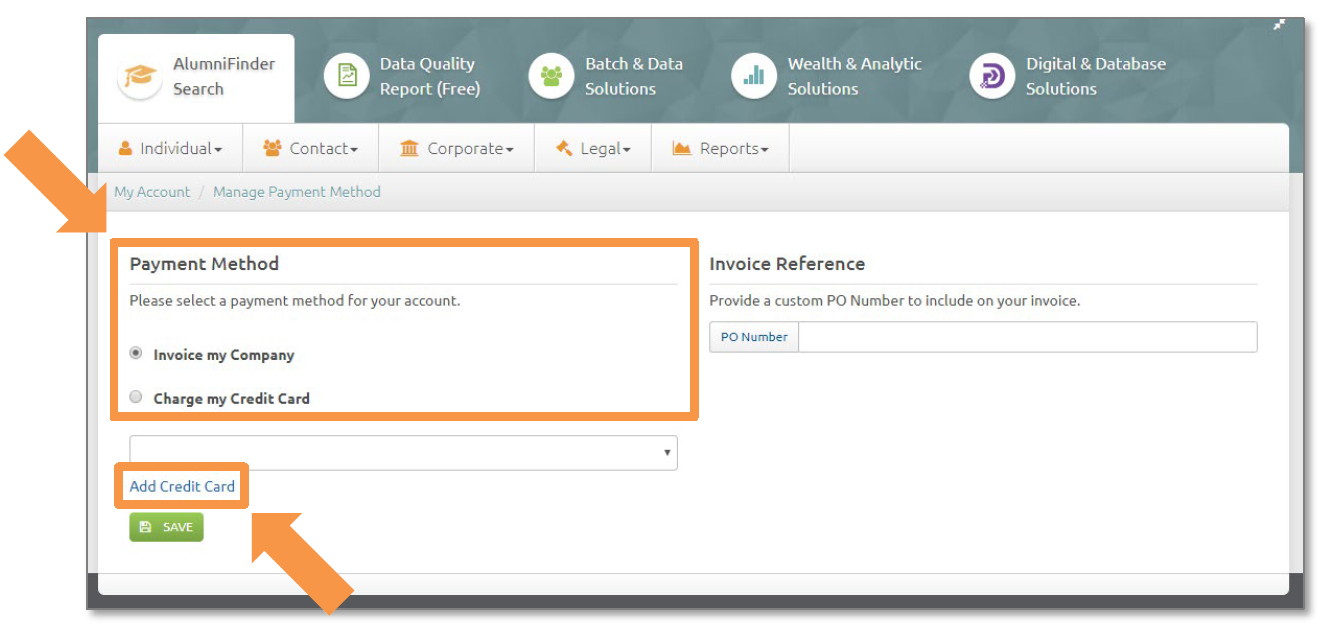
Manage Budget
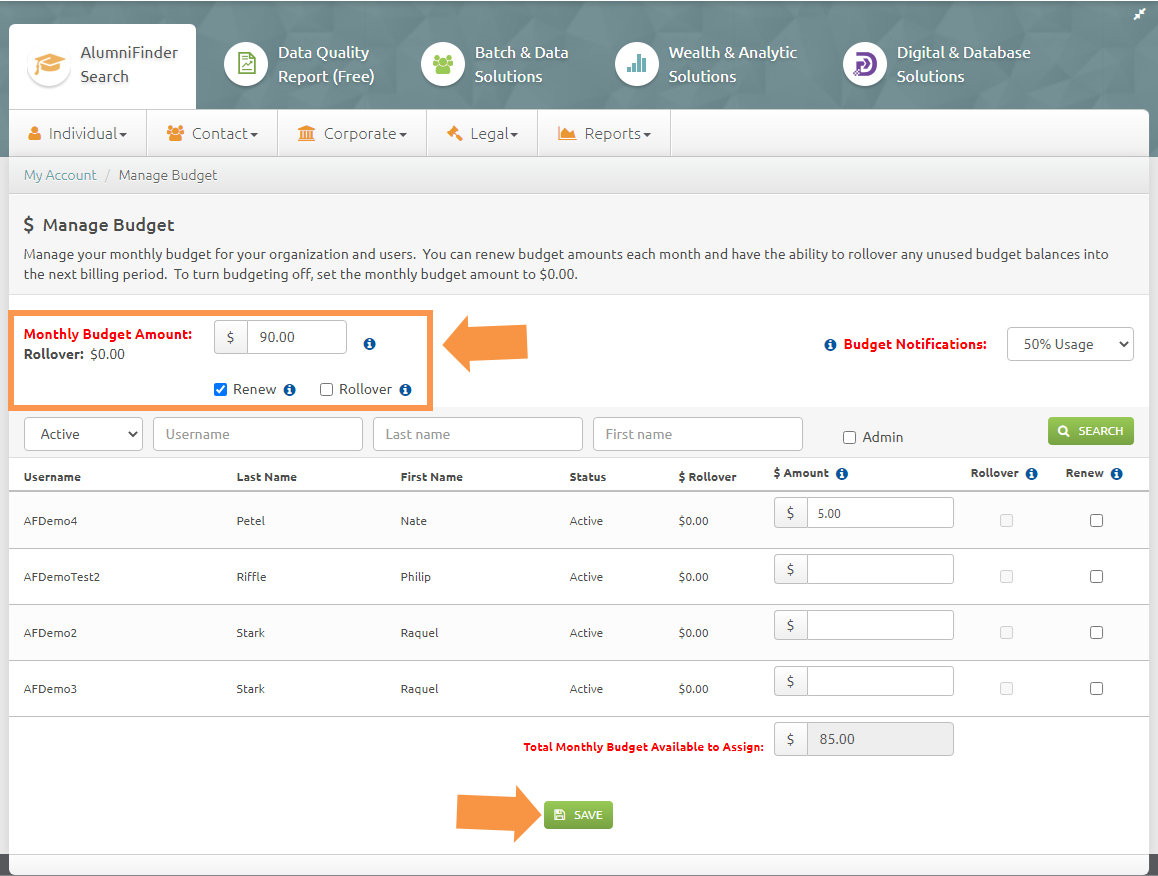
The Manage Budget section allows Administrators to establish a monthly budget for their organization to spend toward searches and reports within AlumniFinder Online. To enable this section, contact your AlumniFinder Representative. Once enabled, select “Manage Budget” from the My Account drop-down menu.
To establish a budget for your organization:
- Enter the desired monthly budget amount.
- The budget amount will automatically renew for each billing period. To disable the automatic renewal, deselect the box next to “Renew.”
- Administrators may choose to roll over any of their organization’s unused budget from one billing period to the next by selecting the “Rollover” option.
- After making any edits in the Manage Budget section, click “Save” at the bottom of the page.
In the event that you need to disable the Monthly Budget, set the budget amount to $0.00 and click “Save.”
Receiving Budget Notifications
Monthly budget notifications are sent to the AlumniFinder Online Administrator. The Budget Tool sends a default notification when 50% of the budget has been utilized.
To edit the usage notification:
- Click on the drop-down menu for Budget Notifications
- Select from the following usage amounts:
- 50%
- 75%
- 90%
- 100%
- After making any edits in the Manage Budget section, click “Save” at the bottom of the page.

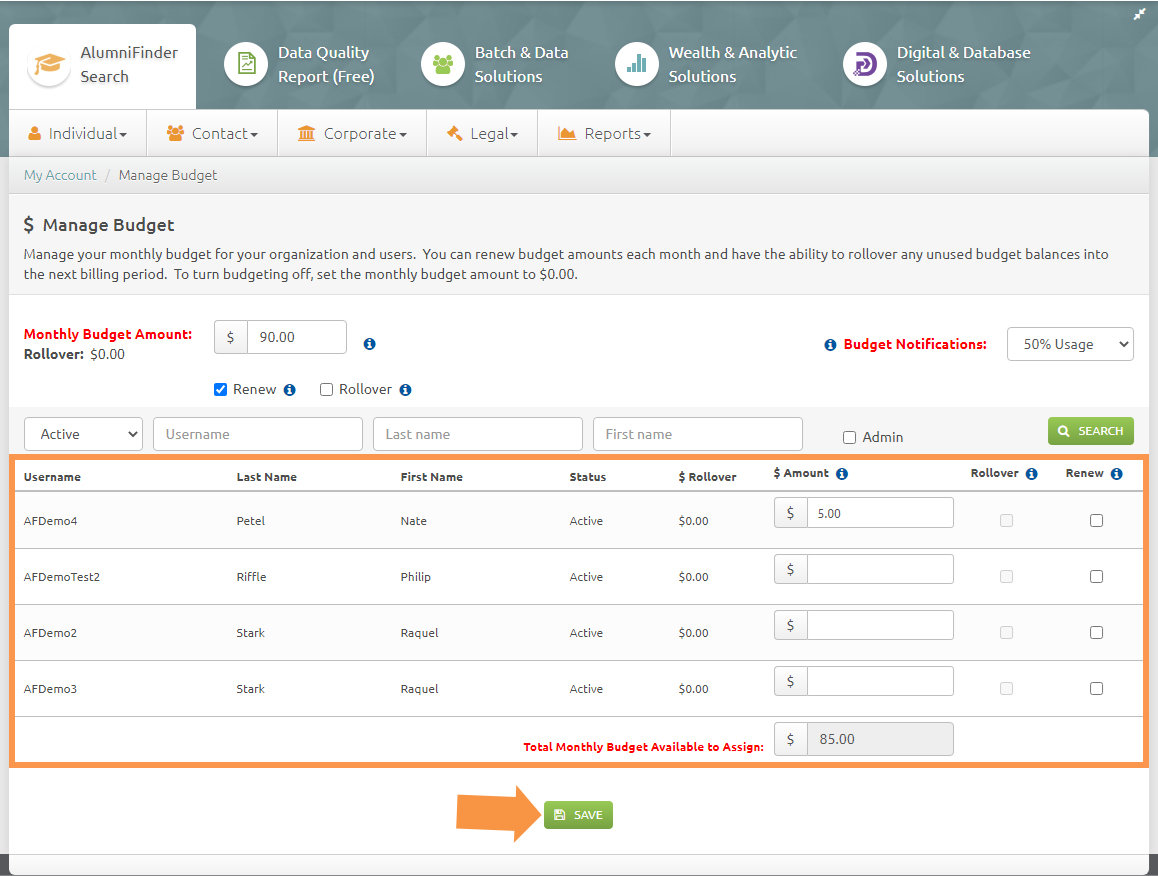
Setting User Budgets
The Administrator can establish budget amounts for individual users within their organization. Please note that if you have enabled the rollover option, you can also roll over individual user budgets.
- Enter the dollar amount you wish to allocate for a specific user in the appropriate field.
- User budgets can be renewed each month by checking the “Renew” box next to the specific user.
- After making any edits in the Manage Budget section, click “Save” at the bottom of the page.
The AlumniFinder Search Administrator features were developed to allow select individuals with more access to and control over their organization’s account as well as to reduce the time spent waiting for additional support. Should you require additional assistance beyond what is provided within this guide, please visit www.alumnifinder.com or call 888-732-0581.